Sunday, July 17, 2016

dn's No-Bake Chocolate Cheesecake Squares

A couple of weeks ago, I saw a tweet from Grant Melton who is part of the culinary production team on The Rachael Ray Show - and baker extraordinaire! He was doing a no-bake dessert segment on the show that day and asked what your go to summer sweet was.

I was going to just send a link to this recipe - then realized that I had yet to put it on the blog! OOPS!

So, I just gave a brief description. He liked the idea so much, he retweeted it!

For me, this is a go to recipe almost any time of the year. It's simple to make, can (and should) be made ahead - except for adding the fruit on top!) and isn't nearly as expensive to make as a full out cheesecake! It's also a bonus that I almost always have all the ingredients on hand!

I've been making this recipe for well over 20 years. I don't recall exactly HOW or WHEN I came up with the basic idea. However, I do recall that I started playing with this idea after a few attempts at making cheesecake. I tried several so called "can't fail" recipes. The baked ones used a lot of cream cheese, eggs and cream. No matter how careful I was, they always fell. The non baked ones also used a lot of cream cheese, cream and usually unflavoured gelatin - an ingredient I've never had any luck using!

Let's be honest here - as delicious as cheesecake can and should be, it is also expensive to make! By the time you buy all the cream cheese, cream and whatever other ingredients the recipe calls for, you feel like you've made a financial investment. If it doesn't turn out, it feels like a waste of time and money! Not to mention it can look really bad when you try to serve it to even the most forgiving and understanding of family and friends!

I figured there had to be a simple way to replicate a cheesecake like dessert without all the expense and worry of how it would turn out! It took a few tries to figure out what ingredients to use, get the quantities to the right proportions and the method to the point where there weren't hunks of chocolate in the cream cheese - though that wasn't so bad either - but I just wanted a really dark creamy chocolate cheesecake on a chocolate crumb crust!

Well, eventually my attempts paid off and I had my No Bake Chocolate Cheesecake Squares! 

Over the years, I've also developed some other no bake desserts including: Orange And Chocolate Cream Pie; LemonCloud Pie; No Bake Chocolate And PBSlice and some variations to Janet & Greta Podleski's Jollygood Squares. You'll find those and just over 100 other recipes in a variety of categories on my recipe index! (Or you can just click on the pic of Sylvester wearing the chef's hat on the right side of the page.)

dn's No-Bake Chocolate Cheesecake Squares

8 ounces bittersweet or dark chocolate
1 1/4 cup chocolate cookie crumbs
1/4 cup block margarine
8 ounces (250 gram) light cream cheese, softened to room temperature
1/2 teaspoon almond extract
1 Litre (4 cups) light, whipped topping, thawed

Spray a 8" square pan with nonstick cooking spray such as Pam. Set aside.

Place the chocolate in a microwave safe bowl. (NOTE: I generally use chips but if using squares or large pieces of chocolate, I cut them into smaller pieces first for more even and faster melting.) Melt on medium power for about 2 - 2 1/2 minutes, stirring after a minute then every 30 seconds or till the chocolate is completely melted and no lumps remain. Set aside to cool a bit before adding to the recipe.

Place the cookie crumbs in a small bowl. Place the margarine in a microwave safe bowl and melt on medium power in microwave - about 45 seconds depending on how cold the margarine is and the power of your microwave. Add the melted margarine to the crumbs and mix thoroughly. Spread the mixture evenly over the bottom of the prepared pan. Lightly pack the crumbs with the back of a fork or spoon to form an even, slightly firm layer (Don't press in too firmly or the crust will be rock hard and difficult to cut once chilled.) Place the pan in the fridge so the crust can set while you prepare the filling.

Cut the cream cheese into small pieces and place in a medium sized bowl. (NOTE: Cutting into smaller pieces makes it easier for the mixer to whip the cream cheese as it isn't trying to work with one giant piece.) With an electric mixer, whip the cream cheese to light and very creamy. Mix in the almond extract. Add the cooled, melted chocolate and mix thoroughly with the cream cheese. Don't worry if there seems to be some tiny amounts of solid chocolate. It is most likely just the difference in temps between the chocolate and the cream cheese!

Blend the thawed whipped topping into the chocolate cream cheese combo and mix thoroughly. Pour the creamy mixture over the cookie crust and spread evenly. Chill several hours or overnight before serving.

To serve: Cut into 8 or 9 pieces and add a topping to individual servings if desired. Topping suggestions: toasted almonds; sliced strawberries; fresh fruit salad; fruit preserve.

Cover and refrigerate any leftovers.

Variations:
- Add 2 Tablespoons of toasted almonds to the crust mixture (reduce cookie crumbs to 1 cup plus 2 Tablespoons)
- Switch out the almond extract for vanilla or orange.
- Sprinkle some toasted almonds, cookie crumbs or finely chopped dark chocolate over the finished dessert before chilling.

NOTE: It is better to add any fresh fruit or preserves to individual servings rather than to the top of the entire dessert as the fruit can get soggy and not look nearly as nice if left sitting for awhile.

Enjoy!
dn

Sunday, June 12, 2016

Garlic And Caramelized Onion Hummus

I make hummus throughout the year but especially enjoy it in the summer. It is the perfect way to enjoy healthier snacks or even as a full meal. When I know the weather forecast is going to be too hot to turn on the oven for a few days, I often try to make up a recipe of hummus and maybe some pita chips a day or so before the heat really sets in. Then, when it is hot. I'll cut up a bunch of fresh veggies, add some crackers or pita chips and a big scoop of hummus in the middle of the plate to enjoy for my lunch or dinner! YUM!

A few years ago, I came across a recipe for "Lick The Bowl Clean Hummus" on Taste Of Home. It had lots of onion, garlic and lemon in it and sounded like a great flavour combo to me!
I don't make a lot of recipes where I have to caramelize the onions. I love the taste of them but it is a process that must be done slowly and stirred often to truly get the best flavour. Sometimes, I just don't have the patience to go through that process no matter how good the end result! That being said, I made an exception for this recipe and I'm glad I did!
Naturally, I made a few changes along the way!

The original recipe called for 2 large sweet onions such as Vidalia. They are a fair bit more expensive, so I used medium cooking onions which I almost always have on hand and added a bit of brown sugar once they started to cook. When the onions were done, I transferred them to the  bowl of the food processor to cool while I deglazed the pan with the lemon juice to make sure I got every morsel of yummy flavour! I added lemon zest for extra oomph.

Speaking of the lemon juice, the original recipe called for 1/4 cup plus 2 Tablespoons which is actually 6 Tablespoons in total. Normally, I love lemon in my hummus but this amount seemed to overshadow the onion and even the garlic. The next time I made it, I reduced the amount of the juice to 4 Tablespoons and added the zest for a much better balance in flavours.

Some hummus recipes recommend roasting the garlic as well. I guess I could have, but frankly I love the taste of garlic so went with the fresh garlic! If you aren't as fond of garlic as I am, you could roast it, toss it in with the onions for the last minute or so of cooking or just add less - the choice is yours.

The other change I made, was to cut back on the olive oil. The original recipe called for 1/4 cup to caramelize the onions in plus up to 1/3 cup added while processing the hummus to the desired consistency. I felt that was way too much oil - even for something as healthy as extra virgin olive oil. So, I used 2 Tablespoons while cooking the onions which was more than enough and an additional 2 Tablespoons in the processing for a total of 1/4 cup. I replaced the additional olive oil with water as needed to get the right consistency - thick but not runny yet easy to use as a dip or spread. I generally add about 1-2 Tablespoons but it can vary from batch to batch so add a little then process a few seconds and add more if needed.

Tahini tends to separate so be sure to stir it well - making sure to dig down to the bottom of the container and along the sides to get the paste and oil to combine thoroughly before measuring. Store opened containers of Tahini in the fridge for up to a year.

This is a very flavourful hummus. It is strong in taste with a bit of a bite thanks to the fresh lemon and raw garlic but goes well with crackers, pita chips and raw veggies.. If you aren't big on lemon, you could use half lemon juice and half water but I'd still recommend adding the zest! I also highly recommend that you make this the day before you wish to serve it as it allows the flavours to blend even more and mellow just a touch!
If you want to make your own Pita Chips, the recipe is included at the bottom of the post for Lemon Basil Garlic Hummus. You may also like my Sweet Potato Hummus and my Roasted Red Pepper And Cashew Hummus.

Garlic And Caramelized Onion Hummus
3 medium onions quartered lengthwise then thinly sliced (about 3 1/2 - 4 cups)
1/4 cup extra virgin olive oil, divided
1 1/2 teaspoons brown sugar
1 can (540ml/19ounce) chickpeas, drained and rinsed
I large or 2 small lemon(s)
4-5 garlic cloves, chopped (about a Tablespoon)
1/4 cup tahini
1/8 teaspoon salt
1/8 teaspoon pepper
Baked pita chips, crackers and/or assorted fresh vegetables

In a large skillet, sauté onions in 2 Tablespoons of olive oil over medium heat until softened. Stir in the brown sugar and combine to coat. Reduce heat to medium-low; cook uncovered, stirring occasionally, for 30-40 minutes or until deep golden brown.
Meanwhile, zest the lemon(s) - you should get about 1 Tablespoon zest. Set aside. Juice the lemon(s), removing seeds and measure. If you have less than 4 Tablespoons top it off with some bottled lemon juice or add water to make up the difference.

Once the onions are caramelized, turn off the heat and transfer the onions to the bowl of the food processor to cool. While they are cooling, pour the lemon juice into the skillet and stir just enough to deglaze the pan. Pour the lemon juice and drippings into the food processor with the onions.
When the onions have cooled completely, add the chickpeas, lemon zest, tahini, garlic, salt, pepper and 2 Tablespoons olive oil. Cover and pulse for a few seconds - repeat 4 or 5 times then process until smooth - about a minute or so depending on the power of your processor. If the hummus is too dry, add a little water - a teaspoon or so at a time and process to desired consistency. (I generally end up adding about 1-2 Tablespoons but this amount can vary depending on your ingredients and how thick you want your hummus to be.)

Transfer the hummus to a container and cover. Refrigerate several hours or preferably overnight before serving to allow the flavours to blend more and mellow ever so slightly.
Serve with crackers. pita chips and/or raw veggies. Yield: 2-1/2 cups.
Enjoy!
dn

Sunday, April 24, 2016

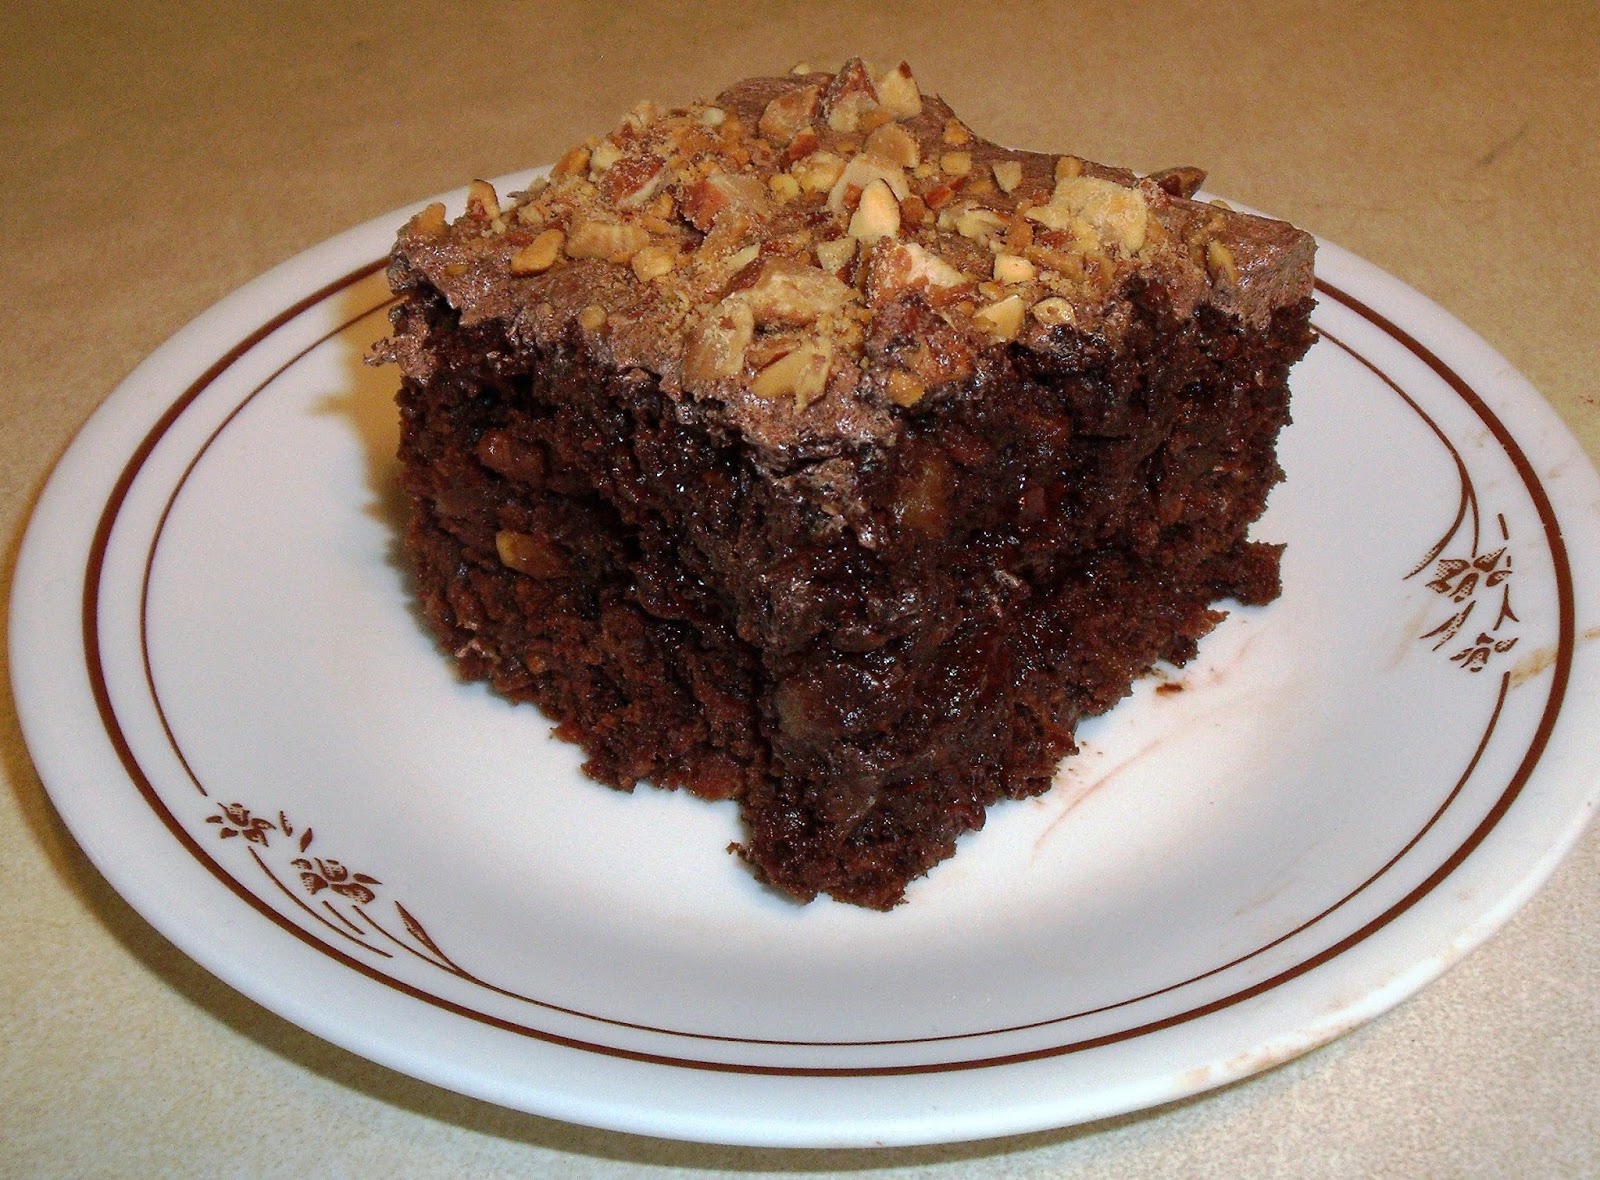
dn's Chocolate Carrot Cake

Back in October of 2010, I shared myCarrot Cake recipe - which was a kicked up version of Janet and Greta Podleski's "Must Bake Carrot Cake" from their "Crazy Plates" cookbook.

Recently, I decided to up the ante on this one just a bit more! I decreased the flour ever so slightly and added some cocoa powder. There was only so much flour I was willing to risk removing, so to offset the additional wee bit more dry ingredients, I decided to add a bit of the pineapple juice to keep it nice and moist. This time, I also toasted the almonds that went into the cake batter - not just the ones for garnish!. The basic icing recipe is the same except this is the chocolate version of it!

As with the previous version, I made it in two 8 inch square pans rather than one large 9”X13” pan. Generally, I tend to find that the center always takes too long to bake thoroughly using the bigger pan. By doing it in two pans, it also spreads the cake more evenly and you get a more even consistency in texture.

The result was a decadently flavourful and moist cake that really made my taste testers happy! They loved it!

It's not completely guilt free but it is lighter than many of the other carrot cake recipes out there that are loaded with sugar, oil and cream cheese frosting but I swear this one is worth the effort and is totally splurge worthy!

dn's Chocolate Carrot Cake
Cake:
1/2 cup raisins
2/3 cup chopped almonds, toasted
3/4 cup buttermilk*
1 1/3 cup all-purpose flour
1 cups whole wheat flour
1/2 cup cocoa powder
2 teaspoons cinnamon
1 1/2 teaspoons baking powder
1 1/2 teaspoons baking soda
1/2 teaspoon salt
1 1/2 cups packed brown sugar
1 cup drained, crushed pineapple (A 540ml/19oz can is the perfect size here. Drain the pineapple over a strainer and reserve juice - some for cake and rest for other uses)
2 Tablespoons pineapple juice
3 large eggs, at room temperature
1/2 cup unsweetened applesauce
1/3 cup vegetable oil
2 teaspoons vanilla extract
3 cups freshly peeled and grated carrots
1 1/2 cups dark or semi sweet chocolate chips

Preheat oven to 350F. Spray two 8 inch square baking pans with nonstick cooking spray and set aside.

Place the raisins in a shallow bowl and cover with hot (but not boiling) water. Stir to separate any raisins that may be stuck together then allow to soak in the water for about 15 to 20 minutes. Drain water off and place raisins on paper towel. Cover with another paper towel and pat to remove access moisture. Soaking the raisins before using allows them to plump up for a better, fresher flavour and texture. (Note: I generally keep at least 1/2 cup that I've pre-soaked and towel dried in an air tight container in the fridge. They will stay good for up to a month that way so are ready for baking, salads or a snack.)

While the raisins are soaking, chop the almonds for the cake and also for the icing (see below for icing recipe) - that's 2/3 cup for each so 1 1/3 cup in total. Line a baking sheet with parchment paper. Spread the chopped almonds in a single layer and toast in preheated oven for about 5 to 7 minutes - stirring at least once or twice to prevent burning. When the almonds are a nice golden brown and have a fragrant, nutty aroma. remove pan to a cooling rack and allow to cool before adding to either the cake batter or top of icing.

* If you don't have buttermilk, place 2 1/4 teaspoons lemon juice in a measuring cup and add enough milk to make 3/4 cup. Stir and then let stand for about 5 minutes before adding to the recipe. Continue measuring and preparing other ingredients while it sits.

In a medium bowl, combine flours, cocoa powder, cinnamon, baking powder, baking soda and salt. Set aside.

In a separate bowl, combine the almonds, raisins and chocolate chips with about 1 Tablespoon of the flour mixture and set aside.
In a large bowl, whisk together brown sugar, pineapple, pineapple juice, eggs, buttermilk, applesauce, oil and vanilla. Stir in grated carrots.
Add flour mixture to carrot mixture and stir until well blended. Stir in almonds, raisins and chips.

Divide batter evenly into prepared pans. Bake for 30 to 35 minutes, or until a toothpick inserted in center of cake comes out clean. (I generally test in two or three spots near the center to ensure the cake is fully done as it is all too easy to mistake melted chocolate chips on the toothpick as raw batter!) Set pans on a wire racks and cool cakes completely before icing.
While cakes are cooling, prepare the icing.

Icing:
2 1/2 Tablespoons All Purpose Flour
1/2 cup milk
1/2 cup white sugar
3 Tablespoons cocoa powder
1/2 cup block margarine, softened
1/8 teaspoon salt
1 teaspoon vanilla extract
1/2 teaspoon almond extract
1/2 teaspoon orange extract
2/3 cup chopped, toasted almonds for garnish

In a small pan combine the flour and milk till smooth. Stirring constantly, cook over medium low heat until a very thick paste is formed.  Remove pan from heat and transfer paste to a small glass dish. Cover with plastic wrap or a plate and allow to cool completely – at least 20 minutes.
In a medium sized bowl, combine the margarine, sugar, cocoa powder and salt with an electric mixer until well mixed. Add in the vanilla, almond extract and orange extract then mix thoroughly. Add in the cooled paste and then beat on medium high speed until very light and fluffy. (This takes about 10-15 minutes on about level 5 or 6 of my Kitchen Aid 9 Speed Electric Hand Mixer.)
Divide icing over the two cooled cakes and spread evenly. Garnish with the toasted almonds.
Each cake will serve 8 or 9 - so 16 or 18 servings in all. Cover and refrigerate any leftovers for up to a week.
Enjoy!

dn

Sunday, March 20, 2016

Lemon Cream Cheese Chippers

Today is the first full day of Spring and next Sunday is Easter! What better way to start the new season than with a tasty new lemon cookie recipe? These would be a lovely addition to any Easter basket or dessert table! To be honest, these are great any time of year!

When I first came up with the idea for this recipe, I assumed that I'd find several similar ones online already. Well, not quite. I found many lemon cookie recipes and many cream cheese cookie recipes. I even found a few lemon cream cheese cookie recipes. The problem was that none of them really seemed to have everything I wanted and never enough lemon flavour! I've played with enough lemon recipes while baking to know that what looks like a lot of lemon in a recipe doesn't always translate to the flavour in the finished product.

So what to do?

After reading several recipes, I actually ended up sort of combining three recipes with a few extra additions!

I already had a great Lemon Pudding Cookie recipe. I also took inspiration from a Lemon Cheesecake Cookie and a Cream Cheese Chocolate Chip Cookie recipe. I compared ingredients and quantities and came up with a beginning version to play with.

After that, it would just be a matter of testing out various quantities till I got what I wanted!

The first time I made them, the dough was far too sticky! I should have just added a bit more flour but I wanted to see if chilling the dough would improve the consistency. BIG MISTAKE! After chilling, the dough was like glue! It was a royal pain to even drop by spoonful onto the pans! Working with that dough wasn't easy even for a fairly experienced baker like myself! The baked taste was good but could definitely be improved.

Lesson learned! The second time, I added a bit more flour and a smidgen more lemon juice. I also added more chocolate chips!

The results were exactly what I had been imagining when I first started searching! A soft and slightly chewy cookie bursting with lemon flavour and loaded with chocolate goodness!
My taste testers thought these were delish!

Happy Spring and Happy Easter!

Lemon Cream Cheese Chippers
2 1/2 cups all-purpose flour
1 99g (4 serving) lemon instant pudding mix
1 teaspoon baking powder
1/2 teaspoon salt
1 large (or 2 small) lemons (You will need the zest and 3 Tablespoons lemon juice)
1 cup granulated sugar
3/4 cup packed light brown sugar
1/2 cup block margarine, softened
8 ounces cream cheese, softened
2 large eggs, at room temperature
1 teaspoons vanilla extract
1 teaspoon lemon extract
2 1/4 cups dark or semisweet chocolate chips
Line three or four cookie sheets with parchment paper and set aside. (Note: I generally like to use four sheets for recipes that make more than 5 dozen cookies. That way I can keep the baking going while rotating pans in and out of oven. I can have one pan baking, one baked pan cooling, one pan ready to go in and one pan ready to go with fresh dough. The parchment paper can be reused at least two or three times within the same recipe.)

Combine the flour, instant pudding mix, baking powder and salt in a medium bowl. Set aside.

Zest the lemon and set aside. Juice the lemon. Set aside.

Place the white sugar in the bowl of a stand mixer and add the lemon zest. Using your fingertips, rub the zest and sugar together. This releases the oil from the zest and infuses it into the sugar for a more lemony flavour!

Add the brown sugar, margarine and cream cheese, Beat on low speed to combine then increase speed a bit to get the batter nice and creamy. Add the eggs and mix well. Add the vanilla extract, lemon extract and lemon juice. Mix in thoroughly.

Add the flour mixture and combine thoroughly. Add the chocolate chips and mix in. Batter will be quite soft and sticky.

DO NOT CHHILL OR FREEZE THE RAW DOUGH!! That will make it even harder to work with.

Drop by teaspoons about 2 inches apart on parchment lined baking sheets. Flatten slightly as the cookies spread very little while baking.
Bake in preheated 350F oven for 10-12 minutes. These brown very little on top but you will see a bit of brown around the bottom. Allow to cool on pan on a wire rack for a couple of minutes before transferring cookies to a wire rack to finish cooling.

Makes about 7 1/2 dozen yummy cookies! These do freeze well.
 Enjoy!

dn

Sunday, February 28, 2016

CNIB ID Card Needs Better Information For Users

Being legally blind, I have a CNIB Photo ID card which allows me to, among other things, ride regular local (Winnipeg) transit for free. The card is good for 5 years. In the past, CNIB clients would get a bit of notice before it expired so that we could get a new photo taken to submit with the renewal form.

In early January. I realized that my card expired at the end of that month and I hadn't gotten my renewal notice. I called the 800 number for the CNIB Helpline to get info on renewal. The man I spoke with was less than forthcoming as to how to renew. Instead he insisted that the only info I would get was through the regional office.

So, I called the Winnipeg office to get details on what was needed. As my number is unlisted and I don't like leaving it on voice mail of people I don't know, it took 3 or 4 tries to talk to a human. I was eventually told that if you weren't on the general mailing list, then notices were NOT being sent anymore AND the onus was now on clients - who of course are VISUALLY IMPAIRED OR BLIND - to SEE the small print of the expiry date on the card. Then we have to get a specific size photo taken, get ourselves down to the CNIB and pay a $10 processing fee!

I learned that the renewal system was divided into quarters. Notices were sent out every 3 months for those whose cards expired within that time. If your card expired near the end of that quarter, you had LOTS of time to get the card done. If it expired near the start, then you were lucky if you got a couple weeks notice! They either couldn't figure out a way to do advanced notices on a monthly basis - or more likely, decided that they couldn't afford or be bothered to update the system for monthly notices.     

I was also told that if you had taken your name OFF of mailing or call lists, you'd get NO renewal notice at all! You either got the newsletters, surveys, catalogues, donation requests and volunteer requests along with the more critical ID renewal notice or nothing at all! I had taken my name off a few years ago as the only service I do use is the ID card.

You've got to love the irony of this bass-ackwards system! 

Yup! The inefficiency and extreme lack of common sense is amazing! You'd think it was run by a government! And yet, some people still wonder why myself and others don't use CNIB services more than we absolutely have to!

Well, I did get myself down to the CNIB late in the first week of January. I had my photo taken, provided my info and paid my $10 fee. I was told I should have the card in about 10 working days.

The new card arrived the day before my old one expired! Phew!

It should be noted that despite being verbally told that no renewal notice would be sent, the letter that accompanied the new card also stated: "You will be given advance written notice when it is time to renew your card."

Hmm... Really? Yeah, well I'll believe it when I see it!

As luck would have it, I WAS asked for the card about a week after the new one arrived! It's not that I get asked for the card that often - but I always have it handy just in case I'm asked for ID. That happens maybe once or twice a year - usually by a transit driver who doesn't know me or when the drivers know/suspect there is a supervisor/inspector on board. Funny thing is, after 25 years with an ID card,, most drivers say don't bother showing it - we know you. However there are the odd (and I do mean odd!) ones who insist on seeing it every time - even if they see you twice on the same day!

Apparently, there are still some other benefits to the CNIB ID Card

Finding any kind of National list of CNIB ID Card benefits seems to be impossible. The CNIB is National, but most of the benefit listings are regional and hard to source without contacting the regional offices directly. Additional documentation is hit and miss at best for most jurisdictions to access any benefits/discounts

The CNIB website has a page called Planes, Trains and Buses with external links to various national sites that offer discounts or assistance with travel provided certain criteria is met. A travelling companion is required for most, if not all of these benefits.

EasterSeals Canada has an Access 2 Card. The card is renewable every 3 or 5 years depending on which you choose. This card offers discounts for various movie theatres and some entertainment facilities throughout Canada and limited access to USA entertainment venues. Some venues/services require both the Access 2 Card and a CNIB card be presented to obtain any discounts/privileges. As with the CNIB Planes, Trains and Buses, the Access 2 Card also requires a support companion for most, if not all of these benefits.

I should clarify here. that I haven't fully researched or applied for the Access 2 Card. I did look through the Attractions in Manitoba in the Venues section but several links seem to be invalid or broken. There are some interesting options, but I don't go out enough to make the card fees worthwhile. My entertainment money is extremely limited so I choose my options very carefully. To be honest, I can't even recall the last movie I watched in a movie theatre but it was likely about 15 or so years ago. I watch my movies at home either via DVD, VOD or on the internet. It's a whole lot cheaper and I can pause or rewind whenever I want!

That seems to be it for any ID card benefits I've found. They may be helpful for some but as I said, my finances are too limited to take advantage of most of them.

I was going to end my post there, but last week I decided to call the 800 Helpline at the CNIB one more time. I'm glad I did as I had a lengthy and very productive discussion with a woman who took detailed notes on my concerns and suggestions for the card and the site. I explained the frustrations with the renewal process and lack of details/benefits for card uses. She confirmed that there didn't seem to be a detailed listing for card benefits and the renewal notice system was counterintuitive. We also spoke about general web content accessibility - not just on the CNIB site but sites in general.

So, what are MY recommendations for the CNIB ID Card?
- create a dedicated web page(s) for the card on the CNIB site that includes:
    - overall purpose, eligibility and general uses
    - how to apply for the card
    - accessible application form that can be filled out online and/or printed in large print
    - a detailed list of services/venues and the benefits/discounts for the card throughout Canada which is also subdivided by region.
    - wherever possible, provide DIRECT hyperlinks to external services/venues rather than to an external home page which leaves the user searching for relevant info.
    - F.A.Q. (quick answers to cost, photo requirements, replacement, updating info, etc)
    - Include a "Report Broken/Invalid Link"
- ALL content and external links checked on an annual basis for validity/relevance
- renewal notices should be sent 2 months before expiry to allow for a reasonable time to coordinate renewal and receive new card.

As for mailing lists from the CNIB, there needs to be a way to opt in or out of specific types of mailings. If someone only wants to receive the renewal notice for the ID card then that should be all that they receive. The onus for renewal should not be left entirely to the client.

Until such realistic, practical and logical changes are (hopefully) made, I'll just stick to using my CNIB ID Card to ride Winnipeg Transit. Hopefully, I'll remember to check for the renewal date every once in awhile as I may or may not receive a notice from the CNIB!

dn

Sunday, January 24, 2016

Cream Corn Soup

I've never been an overly big soup lover. I enjoy a bowl now and then - especially when it is really cold out! I will occasionally order it in a restaurant but generally, I just buy a few cans of soup every year. I just don't like making big quantities of homemade soup - nor do I have the freezer space for it. Finding good soup recipes that I would enjoy AND that only make 3 or 4 servings isn't always easy.

Admittedly, I do "tweak" the canned versions a bit. I will sauté a bit of onion and bell pepper to add to chicken noodle soup - and of course add more chicken! I'll add some leftover cooked meat or additional veggies to vegetable soup.

The most creative I get though, is with a simple recipe my mom used to make! She simply poured a can of cream corn into a pot, then filled the cream corn can with milk and stirred that into the corn. Sprinkle a bit of black pepper on it then brought the whole thing to a boil over medium heat. She usually had a tray of various crackers, fresh biscuits or buns/breads to serve along side. Some people didn't really consider this a real soup but it was a favourite in our house!

I've made cream corn soup at least a couple of times every winter but over the years, I've made it a bit more elaborate. I started with just adding some chopped onion and red pepper then started throwing in some crispy bacon. Eventually I started sautéing the veggies in the bacon drippings and adding a few other ingredients. 
This only makes 4 servings, so not enough for me to get tired of before I eat it all. I've never tried freezing it though as creamed soups don't tend to freeze that well...

So, here it is my own version of Cream Corn Soup!

Cream Corn Soup
8 slices bacon
1/2 cup finely chopped onion
1/4 cup finely chopped red bell pepper
1 1/2 - 2 cups diced potatoes
1 cup kernel corn (thawed and well drained if using frozen)
1 398ml/14.8oz can cream corn
1/3 cup sour cream
2 cups milk
freshly ground black pepper
green onion for garnish
Cut the bacon into small pieces and place in large deep skillet. Cook over medium heat till extra crispy. Remove bacon to a paper towel lined plate. Set aside.

Drain all but about 1-2 Tablespoons of the bacon fat from the pan - but leave the brown drippings in! Add the onion, red pepper and potatoes to the pan and sauté till onions are translucent. Add the kernel corn and sauté another couple minutes.

Add about 1 or 2 Tablespoons of water and stir just to combine and lift some of the drippings from the bottom of the pan. Stir in the cream corn, milk, sour cream and then bring to a boil. Reduce heat to medium (or slightly lower) and simmer uncovered - stirring every few minutes to prevent burning on the bottom of the pan. Simmer about 20-25 minutes or until potatoes are fork tender

Crumble the cooked bacon and stir about 1/2 of it back into the soup. (Reserve the other half for garnish) Add freshly ground pepper to taste. NOTE: There is NO need to add salt to this recipe as there is more than enough salt in the bacon and some in the cream corn.

Divide into 4 soup bowls and garnish with remaining bacon and chopped green onion.
Serve with crackers, biscuits, buns, focaccia or other breads.

NOTE: IF you are not serving it all at one time, the soup can be stored in a covered, air tight container and refrigerated for up to 4 days. To reheat you can either heat the soup in a small pot over medium heat or place each serving in a microwave safe soup bowl, partially cover and heat on medium power for about 3 to 3 1/2 minutes - then garnish with the bacon and green onion just before serving

Enjoy!
dn