Sunday, December 2, 2018

Ready For The Season!


December Already?!?

Where has the year gone?

Admittedly, I haven't gotten as much accomplished this past year as I had hoped but it hasn't been exactly boring either. More like challenging actually....

The glaucoma is pretty much under control with meds but my corneas have been a bit more cloudy/blurry than usual which has slowed me down a bit and made outdoor mobility a bit more difficult. Medically, there is little that can be done without risking the sight I have left - which I'm not willing to do - so I'm learning to take things a bit more cautiously outdoors and ask for help a bit more often. Not easy - but necessary for safety and mobility. Inside my own home and on my PC or Kindle, I take it slower on the bad days and savour the good days!

Last winter was quite icy so the ice grips stayed on my boots pretty much from November through March. Mother Nature had been teasing us with occasional fluffy flakes and flurries over the last few weeks but the white stuff really arrived this past week. It started around noon on Wednesday and by Thursday morning, we here in Winnipeg had received almost 10cm / 4 inches of the white stuff.
The new ice grips are now on my winter boots. 
Sigh. Personally, when the snow comes, I'd love to just be like the bears and crawl into hibernation till spring but ... life goes on and I must carry on with the day to day activities - even those that require me to layer up, lace up my boots and traverse the conditions that the city snowplows have left. (Some are much better than others - especially at intersections!)
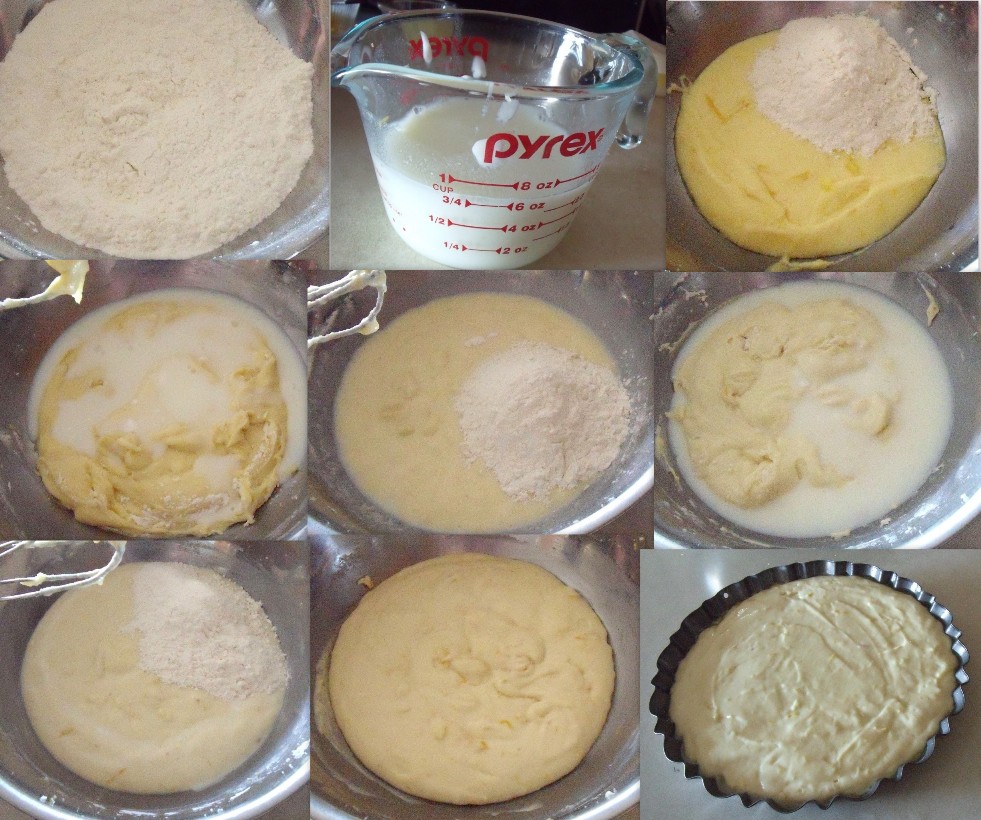
As always, I started gathering my Christmas baking supplies in September. That may sound a bit odd, but you'd be surprised how much of the baking supplies actually go on sale as kids head back to school and again as Canadians prepare for Thanksgiving the second Monday of October..

In late October, I made my annual trip over to Mordens' of Winnipeg on Sargent Ave to get much of my chocolate for the Christmas baking.
By the beginning of November, I finally had all of my Christmas baking supplies but had trouble getting myself motivated to start. Baking turns out better when I am relaxed and in the mood so I didn't want to push it - yet.

As incentive, I told myself that I couldn't start reading a new book till the Christmas baking was done! (Given how many books I've been reading the last couple of years, that is HARSH!) I did manage to chop and roast a 3 pound bag of almonds as well as chop 1 1/2 pounds bittersweet chocolate and make a batch of bark (Boo Boo Candy) that first week.

By November 7, I finally convinced myself that the next 3 days would be strictly baking! I was ready! I mixed up dough for Chocolate Spice Cookies and transferred the dough to a smaller bowl so it could chill in the fridge for a couple hours. When I went to rinse the larger bowl and utensils, I discovered my drain was clogged! I called the caretaker but he was sick and couldn't come till the next morning. So, I bailed out the sink, washed the dishes and bailed the sink again. The next morning I woke to a murky smelly mess in my sink.
The caretaker called a plumber who came that afternoon and spent 90 minutes unclogging a smelly mess! I don't even want to imagine what was in that smelly clog! I'm really careful about keeping clog type items like grease or food residue away from my drain but I know other people in my building aren't as concerned. I lost 2 days of planned baking but the upside is the drain now runs really great!

It was crunch time! Over the next 10 days I whipped up a storm of holiday treats:
2 batches "Chocolate Spice Cookies" (12 dozen)
1 batch Double Chocolate Almond Shortbread (10 dozen)
1 batch Truffles (7 1/2 dozen)
1 1/2 batches Peanut Butter Bars (10 1/2 dozen)
2 batches of Boo Boo Candy (with that first batch earlier, that made 5 1/4 pounds).  
I took the next few days to catch up on errands, appointments, laundry, cleaning and finish the Christmas shopping. Luckily, I don't have to buy a lot of gifts. Back in the late 70's, I started buying a Christmas ornament (handmade whenever possible) for my nieces and nephews. They got an ornament from Auntie every year till they were 18 or moved out of the house. I also did this for a couple of friends kids as they grew up. This gave them enough ornaments to decorate their own small tree. I've continued that tradition with children in my life. Other than that, I only buy gifts for a couple of close friends. Most people in my life get baking.

This past week I resumed baking and did one more batch each of Chocolate Spice Cookies and Truffles as well as a 1/2 batch of the Chocolate Shortbread. Then I packaged it all into gift bags for family, friends and people who help me out through the year.
BTW, as I finished each recipe, I divided it into small portions, wrapped and labelled it before storing in a zipped bag for the fridge or freezer. Doing the pre-portioning step, at that point, saves a LOT of time later. I also keep lists of quantities/packages needed and made as I go. When the treats are all made and I am ready to make up the gift bags, all I have to do is lay out all those pre-portioned packages so that each bag gets one of each type.
I had designed and printed my Christmas cards back in early October. The decorations went up last weekend.
Every year, I have a self imposed preparation deadline of December 1st to be ready for the festive season. I cut it closer than usual this year but I think I'm ready for the holidays! Other than a few trips for groceries, I can pretty much ignore the stores and crowds till January! YEAH!

The year has had its challenges but It has also been good in that I've gotten to spend time with family and friends whom I love. I've shopped with friends, visited over drinks and meals, spent a day in July at Gimli with gal pals and enjoyed my annual autumn walk with a dear friend. I've also spent a lot of time reading - mostly cozy mysteries and a few biographies. As I said, I didn't allow myself time to read this past month but I have a number of books waiting for me on my Kindle! I'm hosting a small dinner party this month and have a few get togethers on the calendar over the next few weeks so I'm feeling thankful and ready for some fun!

Life certainly can throw some challenges at us but I hope you will find some time to truly relax and enjoy this holiday season.

Merry Humbug!
dn


Sunday, October 21, 2018

Chocolate Pumpkin Brownies

It's almost the end of October! Where does the time go? For me, autumn is a time to not only enjoy the all to brief brilliant fall colours but also to play with flavours of the season!

As an unapologetic chocoholic, I am always playing with recipes that contain chocolate! That being said, Pumpkins and Pumpkin Spice seem to be everywhere! What if I could combine the two to make a mouth-watering, can't say no treat?
After a bit of web browsing, I decided to create my own version of a Chocolate Pumpkin Brownie! There are many recipes on line, but most were either a layered brownie, contained little chocolate or little pumpkin.

I tried a recipe that I thought had potential but even after baking longer than stated and cooling, it still tasted under-baked and had no zip to the flavour. Over the last couple of falls, I've played with this recipe to see if I could make it better. I tried adding a bit of baking soda, then also adding a bit of baking powder. I switched the pan size from a 9 inch square to a 9x13 inch. This gave the batter room to rise a bit but not take longer to bake - but still result in a dense, moist brownie. I also added roasted almonds and cinnamon to boost the flavour. It was almost there. I decided to go full on pumpkin spice with ginger, nutmeg and allspice as well! Yup! Just that hint of spice blend without overpowering it was what was needed!

The other major change that I made is that rather than using pumpkin puree, I used butternut squash.

Now, before you get all riled up and claim heresy you can still use pumpkin puree if you wish. I just find that butternut squash is a very reliable substitute and a very tasty vegetable on its own! I grew up eating squash. We never grew pumpkins and rarely even bought them for carving at Halloween as we lived out on a farm and didn't get many trick-or-treater's. I can only recall a couple of times that we ever bought canned pumpkin and those were when our squash didn't mature or were otherwise damaged due to weather.

Using butternut squash as a substitute for pumpkin will NOT change the flavour of the baked item! Once the spices and other ingredients are all added and baked, there is no way anyone will know the difference if you don't tell them! I've been using it forever and no one has ever said it tastes like squash!

Granted, there are many varieties of squash, but I find that butternut has the least amount of waste and is very easy to peel. They are not as watery as some varieties and also have a very similar colour and texture to pumpkin. Butternut squash have a delicious flavour all on their own as a vegetable! It is one of my fave sides in the winter! Every fall, I buy several butternut squash. I peel them, seed them and cut them into about 1 inch cubes. I fill my dutch oven about 2/3 full of the cubes, add a bit of water and a dash of salt then cover and bake in a 350F oven till tender - about 25-30 minutes. Time will vary depending on the size of cubes and quantity. Once the squash is fork tender, drain off the excess liquid and then mash the squash till smooth. Allow to cool to room temperature. Then measure into 1/2 cup portions. Transfer the portions into zippered snack bags, flatten out the squash as you remove air from the bag and seal. Lay flat on a baking sheet to freeze. Once frozen, transfer the zipped bags to a large freezer bag and store in freezer for later use as an individual vegetable serving or for a baking recipe. Thaw required portions completely before using in any baking recipe. (Note: you will find recipes for muffins, cookies, loaves, cake and squares on my recipe page - all using butternut squash rather than pumpkin!)
It took me a few tries to get this recipe to where I felt it was ready to share. It's best when allowed to cool completely - at least 2 - 3 hours before cutting and serving. That allows the brownies to firm up and the flavours to meld even more. It makes a very dark, dense, moist and flavourful treat!.The comments I've gotten on this brownie range from awesome to yummy to can I have some more and I want the recipe!!

So, why not whip up a batch of these Chocolate Pumpkin Brownies then pour a glass of cold milk, a cup of hot coffee or tea and savour an irresistible treat


Chocolate Pumpkin Brownies
3/4 cup chopped almonds, roasted
1/4 cup butter or block margarine
2 oz/60 grams bittersweet chocolate, chopped in small pieces
1/2 cup all purpose flour
1/2 cup whole wheat flour
1/3 cup unsweetened cocoa powder
1/2 teaspoon baking soda
1/2 teaspoon baking powder
1/4 tsp salt
1 1/2 teaspoon cinnamon
1/2 teaspoon ground ginger
1/4 teaspoon allspice
1/4 teaspoon nutmeg              
1 cup white sugar
1 large egg, at room temp
1 teaspoon vanilla extract
1 cup pumpkin puree or butternut squash puree (see above info)
1 cup dark or bittersweet chocolate chips

Preheat oven to 350F. Line a 9x13 inch baking pan with parchment paper. Add the almonds and place in the oven to roast. It will take about 5-7 minutes but you should stir them once or twice to ensure none are burning. When they are nicely golden and aromatic, remove to a cooling rack. Transfer the almonds to a small bowl to continue cooling on the rack.   
Now, spray the parchment lightly with Pam. Set aside.
.In a small, microwave-safe bowl, melt together the butter/block margarine and chopped bittersweet chocolate. Depending on your microwaves power, this should take about a minute or so on half power. It may not look like the chocolate is melted but give it a stir and any remaining pieces will likely melt into the butter/margarine. Allow to cool to room temp but not enough to let it start to solidify,  
 Prepare the remaining ingredients while the mixture is cooling,

Combine the flours, cocoa powder, baking powder, baking soda, salt, cinnamon, ginger, allspice and nutmeg in a medium sized bowl. Set aside
In a large bowl whisk together the pumpkin, sugar, egg and vanilla extract. Add in the cooled margarine/chocolate and mix to combine.
Add in the dry ingredients and stir just until flour mixture is combined. Then add in the chocolate chips and almonds. Stir till thoroughly combined but try not to over mix. Scrape the sides and bottom of the bowl with a spatula to ensure all ingredients are incorporated. Batter will be very thick!
 Transfer the batter to the prepared parchment lined pan and spread evenly .Bake for 23 - 25 minutes, or until a toothpick inserted into the center comes out with only a few moist crumbs (not wet batter) attached. DO NOT OVERBAKE! 
Allow to cool in pan on cooling rack for about 30 minutes then carefully lift the corners of the parchment paper and slide the paper and brownies onto the cooling rack to cool for AT LEAST 2-3 hours MORE before cutting as they take quite awhile to cool completely and set properly. This also allows the flavours to blend a bit more.
 Makes 20-24 brownies
I assume these will also freeze well if wrapped in plastic wrap then stored in a freezer bag but to be honest, they haven't lasted long enough for me to try that. I usually just keep whatever isn't eaten the first day in a covered container in the fridge.

Enjoy!
dn 

Sunday, March 18, 2018

Double Lemon Flan


If the calendar is to believed, spring arrives in just a couple of days! I don't know about your winter, but here in southern Manitoba, we've had a long and cold one this year. Not a lot of snow but I'm looking forward to being able to take the ice grips off my boots and putting the long johns away!

The one advantage to our long winters, is that it gives me lots of time to play with new recipes.

The one I am sharing today is a Double Lemon Flan.

Creating the filling and topping was easy .. but the flan base? The base took three tries before I got it to what I wanted it to be, The first attempt, was lacking lemon flavour, a bit dry and didn't rise at all. The second attempt, was more flavourful but dry and broke apart as I inverted it out of the pan onto the plate.

What to do?

I then remembered that I had a couple of Lemon Muffin recipes that were more like cake than muffin in texture. I pulled out my Lemon Chocolate Chip Muffins recipe that was based on a recipe (LemonChip Muffins)  from Taste Of Home. I knew that my recipe and the original would make far more batter than I needed for the flan base, so I divided my recipe in half with a few more modifications - including not using the chocolate chips. (Yes, I do occasionally make dessert recipes that don't include chocolate! LOL!).

The base didn't brown much but the overall flavour and texture was what I had imagined it could be!
If you don't have a flan pan, you could make this in an 8" or 9" square pan but the presentation won't be as nice.

This would make a great dessert for any gathering at any time of the year! Since Easter Sunday is only two weeks away, it would also look wonderful on the dessert table for your Easter gathering. The oohs, ahhs and mmm's will wow them!

Double Lemon Flan
FLAN BASE
1/4 cup + 2 Tablespoons butter or block margarine, softened to room temp
3/4 cup white sugar
2 large eggs, at room temp
1 1/2 cups all-purpose flour
3/4 teaspoon baking soda
1/8 teaspoon salt
2 large or 3 medium lemons
1/4 cup milk (I used 1%)
1/4 cup sour cream (I used fat free)
FILLING
8 ounces light cream cheese, softened to room temp
1 package (4 serving) instant lemon pudding powder
3 - 5 Tablespoons lemon juice (saved from the lemons used in the base)
2 cups frozen whip topping, thawed
TOPPING
1 1/2 cups frozen whip topping, thawed
1-2 teaspoon lemon zest

Flan Base Directions
Generously spray a flan pan with non stick cooking spray such as Pam. Set aside.
Preheat oven to 350F.

Wash and dry the lemons. Zest the peel of the two lemons onto a medium sized plate. Measure out about 2 teaspoons and set aside for garnish. The remainder will go into the flan batter.
 Juice the lemons, removing any seeds. Measure out 1/4 cup of the juice. Measure the remainder (will likely be about 3 - 5 Tablespoons) of the lemon juice and set that amount aside for part of the filling.
 Place the 1/4 cup lemon juice in a one cup measuring cup. Add 1/4 cup milk  and just enough sour cream to make 3/4 cup. Stir to combine, then let stand for about 5-10 minutes while you prepare the rest of the ingredients.

Place the lemon zest (except for the amount you set aside for the garnish) in a large mixing bowl. Add the white sugar. With your VERY clean hands, rub the sugar and zest together so that the sugar takes on a light yellow colour from the zest. This allows the lemon flavour to be infused into the sugar for an even better flavour. Once this is done, add the butter (or softened black margarine). With an electric mixer, cream together . Scrape down the sides of the bowl, then add the eggs one at a time, mixing and scraping after each addition.
 In a small bowl, combine flour, baking soda and salt;

Add about 1/2 cup of the flour mixture to the creamed mixture. Combine then scrape the sides of the bowl.
Add about 1/2 of the lemon/milk mixture. Mix it in, then scrape the sides of the bowl.
Add another 1/2 cup of the flour mixture and mix it in, then scrape down the sides of the bowl.
Add remaining lemon/milk mixture. Mix it in, then scrape the sides of the bowl.
Add remaining flour mixture. Mix it in thoroughly, Scrape down the sides and along the bottom of the bowl to ensure all ingredients are thoroughly combined.
 Pour batter into prepared flan pan. Using a scraper or the back of a spoon, level the batter out across the whole pan. (The batter will fill up the deeper rim to level up with the batter in the center. Bake in preheated oven for 15-18 minutes. Note that this flan does not really brown around the edges or on top so you will have to use a toothpick to test for doneness. Stick the toothpick in near the deeper part of the rim in a couple places as well as in the center of the pan. If the toothpick comes out clean, the flan is done. If not, give it another minute or two in the oven and test again. Remove pan to a cooling rack to cool for 30 minutes before attempting to invert the flan onto a serving plate. (Note: I forgot to take a pic of the baked flan before removing it from the pan - Oops!) Allow flan to cool completely before making and adding the filling.
 Filling and Topping Directions
In a medium bowl, whip the cream cheese with an electric mixer till light and very creamy. Add the instant lemon pudding powder and the 3 - 5 Tablespoons of reserved lemon juice. Beat till completely combined. (The mixture will be quite stiff due to the instant pudding powder) Fold in about 2 cups of whipped topping. (I guesstimate the amount rather than do a full measure) Mix till uniform colour (no streaks of white) Filling will be VERY thick and a bit stiff. Spread evenly over the top of the cooled flan being careful not to cover the outer rim.
 Spoon about 1 1/2 cups of the whip topping over the lemon cream layer and spread evenly - again being careful not to spread onto the rim. Sprinkle with the remaining 1-2 teaspoons of lemon zest.
 Chill in fridge for at least 2 hours to allow the filling and topping to completely set before serving. At that point, you can either cut and serve OR insert 4 or 5 toothpicks and cover with plastic wrap and return to the fridge to serve later or the next day. Note that using the toothpicks before covering with plastic wrap helps to prevent the topping from sticking to the wrap and therefore creates a nicer display when the dessert is ready to be served - just remember to actually remove the toothpicks before serving so no one accidently tries to eat one!
 Serves 8-10

Enjoy
dn

Sunday, February 4, 2018

Skillet Chocolate Monster Cookie

Remember Monster Cookies? They were all the rage once upon a time. I hadn't made them in years! Then, just over a year ago, I saw Grant Melton make a Monster Skillet Cookie on the Rachael Ray Show.

It looked SO GOOD! I knew I needed to try it! Thankfully I had purchased an oven proof skillet a few months earlier so I just needed to get the ingredients together. Of course I made a couple of small changes to his original recipe like using crunchy peanut butter rather than smooth and peanuts instead of pecans. It was DELISH!

Well, actually, I did have one problem. I didn't want to serve it in my Paderno non-stick pan. I wanted to serve it on a large plate. That meant a double invert to get it out of the pan and onto a plate. I did let it cool for awhile in the skillet before trying to turn it out but I didn't wait long enough! When I did the initial turn, the cookie fell apart! Luckily, I had put a piece of parchment paper over the cookie first so none of the broken pieces and crumbs were lost! It was a very tasty mess!

 A few weeks later, I tried it again and waited till the cookie was completely cooled before doing the invert and that time it worked perfectly!

Then I had this crazy idea to make it even more delish. Why not make it into a Skillet Chocolate Monster Cookie? If I adjusted the basic ingredients a bit and added some cocoa powder AND NUTELLA ,,, the cookie could be downright amazing!
It was time to experiment! I adjusted the amount of Peanut Butter down a bit and added Nutella. That combined amount was a little more than the original Peanut Butter amount so I felt safe adding a few Tablespoons of cocoa powder to up the chocolate flavour even more! I used peanuts rather than pecans as I almost never have pecans in my pantry. I also swapped out the raisins in the original recipe for dried cherries as cherries go really well with peanut butter and chocolate.

The result was beyond my expectations! The PB and Nutella made it moist. The oats made it a bit chewy. The combination of all the add-ins was just right. It was loaded with scrumptious flavour and cookie goodness! I had hit the cookie trifecta!

As always, I took samples to several friends to get their opinions. Let's just say the oohs, awes and mmm's I heard were music to my ears! They LOVED it!

This tasty treat is great for any occasion and can also be frozen if removed from skillet and wrapped in plastic wrap then stored in a zipped freezer bag.


By the way, February 5 is World Nutella Day, so if you are looking for a sweet treat to wow your co-workers, friends and family you can't go wrong with this recipe!

Skillet Chocolate Monster Cookie
1/2 cup dried cherries
1/2 cup butter or block margarine
2/3 cup crunchy peanut butter
1/2 cup Nutella
1 cup brown sugar
1/2 cup white sugar
2 large eggs, at room temperature
2 cups quick rolled oats
1 cup all purpose flour
3 Tablespoons unsweetened cocoa powder
1 teaspoon baking powder
1 teaspoon baking soda
1/2 teaspoon salt
1/2 cup candy coated chocolate candy (M&M’s)
1/2 cup dark or bittersweet chocolate chips
1/2 cup peanut butter chips
1/2 cup blanched, salted peanuts, chopped

Soak the dried cherries in hot (not boiling) water for 15-20 minutes to partially rehydrate. Drain, rinse and chop. Place the cherries in a single layer on a paper towel to drain a bit more while preparing the rest of the recipe. You could also use fresh cherries that have been pitted and chopped into small pieces. If you prefer your dried cherries to be really chewy (like shoe leather for the really dry ones!), you could skip the partial rehydration but I am partial to a softer cherry.

Preheat oven to 350°F.

In an 11 or 12-inch oven proof skillet, melt the butter/margarine. Once melted, turn off the heat and add in the peanut butter, Nutella and both sugars. With a heat proof spatula or whisk, mix until smooth. Remove the skillet from the heat to a cooling rack and let cool for a few minutes.
 While the sugar mixture is cooling, combine the oats, flour, cocoa powder, baking powder, baking soda and salt in a medium sized bowl. Set aside.

Once the sugar mixture is cool to the touch, use your spatula or whisk to mix in the eggs.

Using a rubber spatula, carefully fold in the oat mixture. Once the dough has formed, add in the candy coated chocolates, chocolate chips, peanut butter chips, peanuts and dried cherries. Mix just to combine all the add-ins. Spread the batter evenly in the skillet.
 Place the skillet into the preheated oven and bake for 25-30 minutes or until slightly puffy on top and starting to pull away from the edges.

Remove skillet from oven and place on wire rack to cool before serving.
 Now, depending on what type of skillet you used the serving/presentation may have to vary a bit.

If you used a cast iron pan, you can serve it warm out of the pan.

However, if you use a non-stick pan such as my Paderno, then you will have to use a non stick utensil to slice it in the pan OR preferably take a few extra steps to remove it from the pan to a serving plate when cooled so that you don't inadvertently scratch or otherwise damage the non-stick coating on your pan.

Before you attempt to transfer the cookie to a serving plate, allow it to cool in the skillet for at least 1 1/2 - 2 hours before attempting to remove from pan. This allows the "cookie" to firm up. Attempting to invert it out of the pan before completely cool will result in it falling apart! Trust me - that is what happened the first time I tried making a skillet monster cookie! It was still delish - just didn't have a great look for presentation!

To remove from a non-stick pan:
Once the cookie is completely cooled, place a piece of parchment or wax paper over the top of the cookie in the skillet then place a cooling rack upside down on top of the parchment paper. Align it so that the rack and the paper completely cover the top of the skillet and the cookie inside. While holding onto both the skillet and the paper on the rack, CAREFULLY, turn it over so the rack with the paper is on the bottom and the pan is upside down on top. If the cookie does not slide out within a few seconds, gently tap the bottom of the pan to loosen it. At that point it should separate from the skillet onto the parchment and rack. If the cookie still feels a bit warm on the underside leave it for a few minutes before the final invert. Once the bottom also feels cool to the touch, place a serving plate upside down on top of the cookie. Now, CAREFULLY turn the whole thing over so the plate is on the bottom with the cooling rack on top. Remove the top rack and paper.
Cut into wedges and serve! This will easily make 12-14 servings.
This can also be frozen whole or in pieces - just wrap whole or each section in plastic wrap before placing in a freezer bag. Store in freezer for up to 2 months.

Enjoy!
dn

Sunday, January 14, 2018

Nuts And Bolts

I'm not big on snacking but when I do, one of my all time fave snacks is "Nuts And Bolts"! Not the kind you buy in a bag or box or even in the bulk food section of some large grocery stores. I'm talking about the homemade version!

Over the last few months, I've seen a number of comments online about the classic snack "Nuts And Bolts". Some love it. Some hate it. Some just find recipes that call for ingredients and seasonings that just don't mix well and lament the waste of time and money on ingredients.

Wait! You say you don't know what "Nuts And Bolts" are? Well, in some places it is also known as "Party Mix" or "Chex Mix".
Whatever you call it - it is a deliciously addictive snack! Served warm, room temp or straight out of the freezer it is devoured in no time! It is often served with cocktails or other alcoholic beverages but also great with a soda/soft drink or even a glass of ice water!

So, what's in it? Well, that to can vary by region but the basics are a couple of cereals, mini crackers, pretzels, peanuts and seasonings. It's baked in a low/slow oven to allow the added seasonings to be deeply absorbed into the mix for an even better flavour!

Personally? I prefer the following:
Cereals - Cheerios and Shreddies, Both are original versions - that is, they have not had flavours such as honey/sugar coatings, cinnamon or fruits added. Many people also use one or two varieties of Chex cereals such as oat or rice - just don't use a flavoured version like the chocolate or vanilla ones!
Crackers - Cheese Bits or Cheese Nips, Both are made by Christie and add a nice touch to the mix without having an overwhelming flavour or flavour that would not match well with the other ingredients and seasonings.
Pretzels - I prefer the basic lightly salted thin pretzel stick. You could use the small pretzel twists/knots if you choose. Just be sure to break either version in half as they are both a fair bit bigger than the other ingredients. Either way, just avoid all the flavoured ones such as smoked or hickory.

 Peanuts - blanched, salted peanuts work the best. Some people use a mixed nut combination but as those are more expensive and mostly peanuts anyways, why not just use peanuts! As with the other ingredients, avoid flavours such as smoked, hickory, beer or BBQ. A simple salted peanut without skins works best.

Butter or block margarine is your choice. I use block margarine as it is a whole lot cheaper than butter which is important on a tight budget.

Seasonings - A lot of extra flavour comes from the Worcestershire Sauce, The other two seasonings are Garlic POWDER and Onion POWDER. DO NOT USE GARLIC SALT OR ONION SALT!  There is more than enough salt in the other ingredients!

Using specially flavoured ingredients or playing with other spice additions is just a waste of time and money. They won't work with this mix and will result in a nasty flavour that even the squirrels will run from!

The recipe I'm sharing today, is one that has been in my family for over 50 years! I can still remember helping my mom make this when I was a kid. My mom would often make huge batches just to be able to have extra in the freezer. It was amazing how quickly it could disappear! It was a quick and easy snack to pull out of the freezer for when we had unexpected company stop by. It was always a hit at parties! You can also package it up in gift bags for a hostess gift!
By today's standards of snacks this may seem a bit retro but if you make it for when you are having some friends/family over for the evening, to watch a movie or sporting event, believe me when I say that "Nuts And Bolts" will be a big hit! It will disappear in no time!

At the bottom of the recipe, you will find a guide to making larger quantities of this tasty snack!

I hope you enjoy this snack as much as our family has!

Nuts And Bolts

2 cups broken lightly salted pretzel sticks
2 cups blanched, salted peanuts (sans skins)
2 cups shreddies (original)
2 cups cheerios (original)
2 cups cheese bits or cheese nip crackers

1/2 cup butter or block margarine
1 teaspoon Worcestershire sauce
1/2 teaspoon onion powder (NOT SALT)
1/2 teaspoon garlic powder (NOT SALT)

Combine the first five ingredients in a roaster or dutch oven
Melt the butter/margarine - either in the microwave or in a small pot on the stove. Add the Worcestershire sauce, garlic and onion powders. Mix thoroughly. Pour over the ingredients in the roaster and stir to thoroughly combine and coat the other ingredients.
Place uncovered pan in preheated 200F oven and bake for about 1 hour 15 minutes - stirring every 15 to 20 minutes. Note: at the 1 hour 15 minute point, I generally taste a couple of the shreddies. If they are still really soft then I leave the mix in for another 15-20 minutes. At that point the shreddies are usually getting quite firm and will crisp up when cooled.
 Serve warm or cold. Can easily be reheated for later use. This recipe freezes well.

Note that this recipe can easily be multiplied 2, 3 or 4 times if you have a large enough pan. Baking times will take a bit longer depending on size of batch and container used. 

Enjoy!
dn